Wednesday, May 26, 2010

Steak n' Mousse

No theme today, just the next week hanging over us -- next week is the last class, and we will be serving dinner to the friends and families of the students and a number of the staff, perhaps 25-30 mouths all together. So today was all about making some fancy labor-intensive desserts for next week, and a few simple dishes to get us fed today.

Pastry chefs run in a slightly different world than the rest of the kitchen, due to the fact dessert is usually NOT a la minute -- it can be prepared hours, if not days in advanced, and will not lose quality. These workers can come in early and take over the kitchen and make complex recipes like the following, before the main staff come in to prep the rest of the menu....

TRIPLE-CHOCOLATE MOUSSE CAKE

Yield: 2 cakes, 24 to 36 servings

BOTTOM LAYER
Butter, cut into 12 pieces 6 oz
Bittersweet chocolate, fine chop 14 oz
Instant Espresso powder 1 ½ tsp
Vanilla extract 1 tbsp
Eggs, separated 8 each
Salt 2 pinches
Light brown sugar, crumbled 2/3 cup packed

MIDDLE LAYER
Cocoa powder, dutch process 4tbsp
Hot water 5 oz
Bittersweet chocolate, fine chop 14 oz
Heavy cream, cold 3 cup
Sugar 2 tbsp
Salt ¼ tsp

TOP LAYER
Powdered gelatin 1 ½ tsp
Water 2 tbsp
White chocolate, fine chop 12 oz
Heavy cream, cold 3 cup

Shaved chocolate or cocoa powder for serving

  1. BOTTOM LAYER:
    Preheat oven to 325˚. Grease bottom and sides of 2 10”spring form pans. Slowly melt butter, chocolate and espresso powder in double boiler, stirring until smooth. Remove from heat. Wait 5 minutes. Whisk in vanilla and egg yolks. Set aside.
  2. In stand mixer with whisk attachment, beat egg whites and salt until frothy. Add half sugar and beat until combined. Add rest of sugar and beat until soft peaks, scraping down sides half way through.
  3. Fold egg mixture into chocolate mixture one third at a time, until no white streaks remain. Pour into two prepared spring form pans.
  4. Bake 13-18 minutes, just set but soft in middle. Cool for 1 hour, leave in pan.

  5. MIDDLE LAYER.
    Combine cocoa powder and hot water, set aside. Melt chocolate in double boiler until just smooth, take off heat and let cool 2 minutes.
  6. In stand mixer, whip cream, sugar and salt together to soft peaks.
  7. Whisk cocoa powder mixture into melted chocolate until smooth. Fold whipped cream into chocolate 1/3 at a time until no streaks remain. Spoon into spring form pans on top of bottom layer. Smooth with spatula and clean off any drips from the inside sides. Refrigerate for a minimum of 15 minutes.

  8. TOP LAYER.
    In a small bowl, sprinkle gelatin over water. Let stand for at least 5 minutes.
  9. Bring 1 cup cream to a simmer in a sauce pan. Remove from heat and add gelatin mixture, stir until dissolved.
  10. Pour cream mixture over white chocolate in a bowl, whisk until smooth. Let stand 3 to 5 minutes
  11. In a stand mixer, whisk remaining 2 cups of cream to soft peaks. Fold into white chocolate mixture, one third at a time. Spoon over middle layer.
  12. Set in fridge for at least 2.5 hours. Serve with garnish of cocoa or shaved chocolate.
This recipe was adapted from Cook's Illustrated, which was much more wordy and full of explanation of why. Which is great for someone like me, but a bad distraction from students just trying to get the thing done in the time given.

We cooked off a few flank steaks in the oven -- ideally it would be on a grill, but we had no access to one, so into the convection oven we went. The marinade was blended to smooth, the steak poked fill of shallow cuts with the tip of a chef's knife.

CHIMICHURRI FLANK STEAK

Yield: 12 servings

Flank steak, trimmed & scored 1 each
Vegetable oil 2 floz
EVOO 2 floz
Cider vinegar 2 floz
Garlic cloves, minced 2 each
Cumin 1 tsp
Oregano, fresh 1/3 cup
Cilantro, fresh ½ cup
Parsley, fresh 1 cup

  1. Combine all ingredients except steak. Puree in blender. Marinate steak in ½ of marinade for 1 hour.
  2. Cook in oven at 300˚ until internal temp reaches 135˚. Rest 10 minutes, slice against grain, serve with remaining marinade.
135 is medium rare, and as I found out, feeding medium-rare meat to this population of students is about as likely as serving a vending-machine hamburger at Nobu. So I cooked off each of the three steaks differently -- medium rare (135), medium (142) and well-done (150), but even the well done was not well-done enough for them. There was no pink, but it was still juicy. After it was sliced, one student put it in a sautee pan and cooked it until it had browned edges, and the consistency was closer to tough leather than unctuous steak. Blech! Over-cooked meat is part of a culture of fear of illness from undercooked meat, particularly established in lower economic rungs, where access to good meat is more rare.

A student last week suggested collards, and we did a pretty standard version.

COLLARD GREENS

Yield: 12 servings

Smoked ham hocks 2 lbs
Water 1 g
Salt to taste
Collard greens 4 bunch
Cider vinegar 1 cups
Sugar 3 tbsp
  1. Place the pork, water and salt in a pot. BTB, skim off any fat that rises to the top. Reduce temperature to low and let simmer for 30 minutes.
  2. Meanwhile, prepare greens. Discard damaged or yellow parts of leaves. Cut away the tough ends from each leaf. Place greens in a colander, wash thoroughly. Fold each leaf in half at its center vein, fold over once or twice more, then cut in half.
  3. Stir prepared greens into the simmering liquid. Let simmer all together for approximately 1 hour over low heat. Add half of sugar and vinegar, taste and adjust. Serve.
One student decided to "spice" it up at the end, throwing in a bunch of dried spices and a bit too much hot red pepper flakes. Regardless, the long boiling in the smokey stock eliminated any bitterness, and the vinegar gave a nice kick.

One student has been bragging about his skill making banana pudding since the day I met him, but unfortunately he did not show up today. When everything was well underway, I decided to fit this in at the last minute.

BANANA PUDDING

Yield: Two 9 x 13 pans

White sugar 10 oz
AP flour 2/3 cup
Salt ½ tsp
Egg yolks, beaten 6 each
Heavy cream 1 qt
Vanilla bean, scraped 2 beans
Rum 1 oz
Butter, softened ¼ cup
Bananas, peeled & sliced 4 each
Nilla wafers 12 oz
  1. In medium saucepan combine sugar, flour and salt. Add eggs and stir well. Stir in cream, and cook over low heat, stirring constantly. When mixture begins to thicken, remove from heat and continue to stir, cooling slightly. Stir in vanilla, rum and butter until smooth.
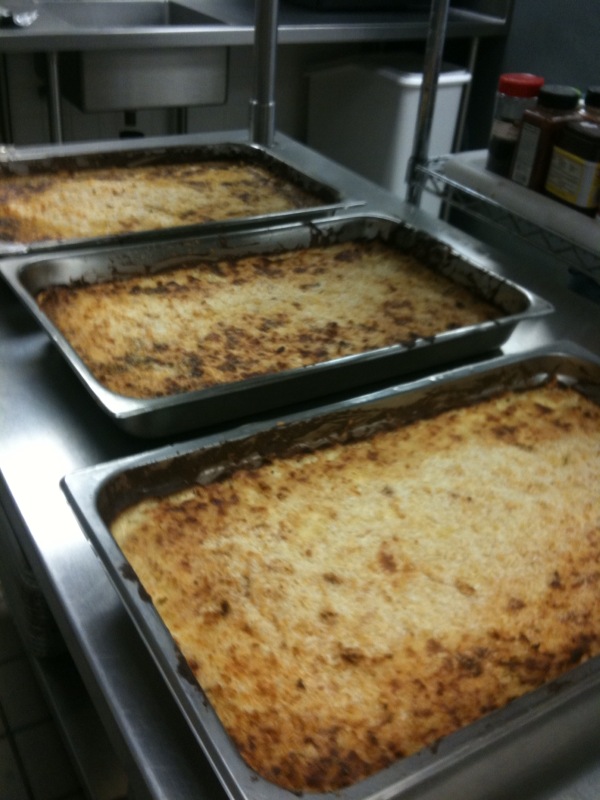
  2. In two 9x13-inch dish, layer pudding with bananas and vanilla wafers. Chill at least one hour in refrigerator before serving.
We went off the reservation with this recipe a bit. First, we ran out of cream so substituted coconut milk for about 1/3 of the cream. Second, in deference to next week, we decided to make mini banana pudding cups in cupcake papers. Third, we were given horrible "reduced fat" Nilla wafers, so we ground them in a blender and added a few sticks of butter to unreduce it. In the cups we pressed in some of the Nilla mix, a layer of the rum-vanilla pudding, a few slices of bananas, then a layer of simple whipped cream. When we serve it, we'll sprinkle some cinnamon sugar.

Next week, the wrap-up!

Wednesday, May 19, 2010

Italian with Mario


I started today's lesson with a personal story, which seems to be an effective way to start a class -- seems simple, why didn't I figure this out sooner? A few years ago I was visiting an old friend outside of London, England, where she took me to her best friend's house for dinner. The friend made a lasagna "from scratch". It certainly looked like a normal lasagna. When I cut a piece off with a fork (felt right), I placed the bite in my mouth and tasted...nothing. At all. I was not sick or stuffed up, but I took a paper napkin and quickly blew my nose to make sure it was clear -- the only time I ever had an experience like this was when my nose is stuffed, preventing nerve ending in the nasal cavity from detecting taste. Nope, the lasagna tasted like nothing.

I politely said it was great, and helped clean up. At this point I was able to do some detective work. Premade sauce from a jar. No-fat diet ricotta cheese. Pre-cooked lasagna pasta sheets from the refrigerator section. No-fat diet mozzarella cheese. Dried herbs, probably been sitting in a jar for years in her spice rack. No sign of salt or olive oil. Wow. That pretty much explains it.

Today, we would make an Italian baked pasta dish, truly from scratch. But to make something like a Baked Ziti, you don't just go and buy the components, some of them you should make... particularly the bescamela sauce, the bread crumbs and, of course the tomato sauce....

BESCIAMELLA

Yield: about 5 cups
Butter ½ cup
AP flour ½ cup
Whole milk 1 quart + ½ cup
Salt 1 tbsp
Nutmeg, freshly grated 1 tsp
  1. In a saucepan, melt the butter over medium heat. Add the flour and stir until smooth. Cook, stirring until light golden brown 6 to 7 minutes.
  2. Meanwhile, in another saucepan, heat the milk to just under a boil. Add the milk to the butter mixture about 1 cup at time, whisking constantly until very smooth, and bring to a boil, whisking. Cook, whisking, until thickened, about 10 minutes; remove from the heat.
  3. Season with the salt and nutmeg. Transfer to a bowl and let cool, then cover and refrigerate until ready to use.
BASIC TOMATO SAUCE

Yield: 8 cups
EVOO ½ cup
Onion, small dice 2 large onion
Garlic, minced 8 cloves
Thyme, chopped ¼ cup
Oregano, chopped ¼ cup
Carrot, grated 2 each
Basil, chiffonade ¼ cup
Whole peeled tomatoes, milled Four 28oz cans
Salt to taste
  1. Heat olive oil in saucepan. Soften onion, then add garlic for 1 additional minute.
  2. Add thyme, oregano and carrot and cook until carrot is soft, about five minutes
  3. Add tomatoes and basil. Simmer until thickened, about 30 minutes.

BREAD CRUMBS
Yield: about 4 cups
Italian bread, thickly sliced 1 loaf, fresh
  1. Place bread slices on a sheet into a cold oven. Heat to 200˚
  2. Remove when bread is dry but not too browned. Place in a food processor and pulse until only crumbs remain – not too chunky, but not a fine powder, either.

I had three teams of two bang out these three, and as they finished, I had them work on the other components of the ziti -- pasta that is undercooked then chilled fast, grate the cheese (NOT pregrated, of course) and good imported buffala moz chopped into cubes.

ZITI AL TELEFONO (BAKED ZITI)

Yield: 8 servings
Ziti 2 lb
Tomato Sauce 4 cups
Besciamella 4 cups
Buffalo mozzarella 2 lbs
Parmigiano-Reggiano, grated 1 cup
Bread crumbs, fresh 1 cup
  1. Preheat oven to 425˚.
  2. Bring 3 gallons of water to a oil in a large pot, and add 2 tablespoons of salt. Cook the ziti for 2 minutes short of the package instructions; it should be too al dente to eat. Drain and rinse under cold water until cool. Drain a second time and place in a large bowl.
  3. Add the tomato sauce, besciamella, mozzarella and Parmigiano to the ziti and stir to mix well. Sprinkle with the bread crumbs.
  4. Bake for 20 minutes, until bubbling and crusty on top. Serve immediately.
When all six components were laid out in front of us in mise bowls, I called the students over and gave a short lecture about Italian cooking. These six ingredients -- pasta, tomato sauce, cheeses, white sauce and bread crumbs -- are all not only simple common things, but used in thousands of configurations to make hundreds of different regional styles. Italy has literally had thousands of years to develop their cuisine, while being limited to a relatively small group of ingredients. Pasta alone, there are hundreds of shapes that grab sauce in particular ways, changing the taste, texture and experience of a dish. Angel hair pasta in tomato sauce can have the same exact ingredients as spirals in tomato sauce, but will be quite a different dish.

And then we got all Grandma with it and mixed everything together, topped with crumbs and slammed in the oven.

Last weeks, one of the kids requested fried shrimp, and pretty much every cuisine will have a version, and here is an Italian one...


FRITTO DI GAMBERONI (FRIED SHRIMP)

Yield: 6 servings
EVOO Enough for deep frying
Large shrimp, cleaned 3 lbs
Lemons, 1/8” slices 2 each
Cornstarch 2 cups
Wondra flour 2 cups
Salt to taste
Black pepper to taste
Lemons, wedges 2 each
  1. Set up deep saucepan with fryer basket. Heat oil over medium heat to 375˚.
  2. Place shrimp in a bowl. In another bowl, combine flour and cornstarch.
  3. Combine half the shrimp, half the lemon slices and half the flour mixture in a 3rd bowl. Toss quickly with hands to coat, then toss in a colander and bat against your hand to remove excess flour mixture.
  4. Place coated shrimp and lemons in fryer basket and gently lower into hot oil. Cook until golden brown and crisp, 1 ½ to 2 minutes. Transfer to a drying rack to drain.
  5. Once oil returns to 375˚,immediately repeat with remaining shrimp and lemon slices.
  6. Season with salt and pepper, serve with lemon wedges and tomato sauce for dipping.
The kids were a bit freaked out by the deep fried lemon slices, they didn't like the pale color of the final product or the lack of crunch, BUT they liked it anyway. They're used to the fried shrimp out of the Chinese takeaways, but appreciated this different spin.

BROCCOLI AL FRASCATI

Yield: 6 servings
EVOO 3 oz
Garlic, sliced 4 cloves
Broccoli, cut into spears 3 lb
Frascati or other dry white wine 1 cup
Hot red pepper flakes 1 tbsp
Lemon zest 1 each
Orange zest 1 each
  1. In a large sauté pan, heat olive oil with garlic over medium heat until just sizzling.
  2. Add broccoli and cook, tossing frequently and gradually add the wine to keep the garlic from browning, until stalks are tender, 8 to 10 minutes.
  3. Add red pepper flakes and zests, tossing well.
I was impressed by this recipe, but I had never made it before, and unsurprisingly the kids didn't dig it. Redolent of wine and fruit without being sweet, the broccoli was tender but crisp, and nice spicy kick that made the wine and fruit flavors pop.

As I was doing the final cleanup after the students ate and left, I found this copy of the recipes, from a student who I assumed was not paying attention, because she stared at her sheet and doodled through my entire lecture. As it turns out, she was taking notes AND drawing little hearts!

Friday, May 14, 2010

Norbert Thursday (A momentary lapse into veganism)

Edie is doing better, but she's used to eating just formula all day, so spending more time with her as she sits with solid food is a focus. We went out on foot today for a solid 4 hours and she was totally back to normal, food excepted.

AM SNACK: 8:30am, large glass of iced mint green tea

BREAKFAST:
9:45am, organic whole grain chex with organic dead milk, .5 bowl, hunger 4/5

LUNCH pt 1:
11:30am, large green salad, .75 bowl, hunger 4/5

LUNCH pt 2: 1:30pm, slice of 'zen' pizza, small cup of vegan chocolate 'ice cream', 1.25 bowl, hunger 4/5
A big ol' vegan lunch in honor of the HVS. Went to Viva Herbal to have the spelt-crusted green tea-infused soy mush and other stuff thing. Walking down the street, felt the urge for sweets but didn't want to go too far into the red, so stopped in at Stogo, for their so-called "ice cream", but what I ate was kinda gritty, bland and bitter punctuated by dry, pasty chunks of "brownie". Ick.

PM SNACK: 2:30pm, bottle of unsweetened green jasmine tea
Thirsty after a short Wholefoods shop, I picked up a bottle of Tea's Tea unsweetened green jasmine tea, the same kind of tea I've used in my last batch of ice tea. I wanted to taste green jasmine in unsweetened form, and it surprised me -- the jasmine flower flavoring gives a depth of flavor that is kinda like sweet without the sweetness. No wonder my iced tea tastes so sweet, the jasmine perfume is amplifying it.

DINNER: 7:30pm, roti cannai with curry dipping sauce, spicy shrimp & vegetables over brown rice, chocolate experiment, 1.25 bowl, hunger 4/5
I plan to make the MOST DECADENT OVER THE TOP RE-GOT-DAMM-DICULOUS chocolate ice cream for Edie's birthday, so for Saturday's brunch, I'm going to serve experimental chocolate ice cream, a winged-recipe based on a creme Anglais base. I put one ramekin of the custard in the freezer just to taste it for sweetness when cold -- it was good. The balance ain't there yet (less instant espresso, a different technique to get the chocolate less gritty needed) but it's a good start.


Thursday, May 13, 2010

Breakfast


Most of the food we've done in class is lunch or dinner or dessert or snacks -- nothing particularly aimed at the first meal of the day. I purposefully excluded eggs because of two reasons: one, the many methods and techniques of cooking eggs can be a class to themselves and two, I absolutely despise eggs as a dish. Probably because my mom made me eat really poorly cooked eggs, but that's a rant for a different kind of blog.

My lecture was short and sweet and about sausage. By taking "off" cuts of meat, cuts of the tougher, less palatable cuts and grinding them up and added spices, the sausage method made previously unusable parts of the animal not only usable, but quite delicious. I showed them the meat grinder and took it apart and explained how it worked, and discussed why it's important to cube the meat into small pieces -- the connective tissue between muscles, or "silver skin", will get caught in the blade and create friction and heat, which will cause the fat in the chilled meat to warm up and run out, creating dry, crumbly sausage.

BREAKFAST SAUSAGE

Yield: 6 servings
Sage 1 tbsp
Salt 1 tbsp
Pepper 1 ½ tsp
Marjoram ½ tsp
Brown sugar 1 tbsp
Red pepper flakes 1/8 tsp
Cloves, ground 1 pinch
Pork butt, chilled 3 lbs
Fatback 1 lb
  1. Combine all ingredients except meat in a bowl and mix well. Set aside.
  2. Cut meat & fat into 1” cubes, then run through grinder twice – first through the big dye, then through the small dye. Keep meat on iced bowl to keep fat emulsified.
  3. Combine spice mix with meat with hands, quickly. Form into equal sized patties. Sauté patties in a large skillet over medium high heat for 5 minutes per side, or until internal pork temperature reaches 160 degrees.
We had a "pork butt", which is actually the shoulder, and the students watched while I broke it down, removing the skin and the center bone. When the ground meat came out of the machine, they were surprised that it looked just like the stuff they bought in the shop.

Toward the end of class we cooked off the sausage in small heaping-tablespoon patties in peanut oil, and the students were impressed how delicious they were -- like real breakfast sausage. I told them they COULD just buy ground pork and mix in spices and make the sausage very simply that way -- and it would be hella more healthful than the Jimmy Dean crap you buy in a freezer case.

Speaking of healthful, the next recipe is probably the healthiest thing I've cooked with this class. This is my riff on the Olive Oil Granola that was made popular by the NY Times.

GRANOLA

Yield: 4 servings
Old-fashioned rolled oats 3 cups
Raw pistachios, hulled 1 ½ cup
Raw pumpkin seeds, hulled 1 cup
Shredded dried coconut 1 cup
Maple syrup ¼ cup
Light brown sugar ½ cup
Extra virgin olive oil ½ cup
Salt 1 tsp
Cinnamon, ground ½ tsp
Cardamom, ground ½ tsp
Vanilla, 1 tbsp
Dried apple, chopped ½ cup
Dried cherries, chopped ½ cup
  1. Preheat oven to 300˚. In a bowl, combine all ingredients except the two dried fruits. Spread on a rimmed baking sheet in an even layer and bake for 45 minutes, stirring every 10 minutes, until golden brown and well toasted.
  2. Transfer granola to a large bowl and add dried fruit, tossing to combine.
One student was moaning about how she didn't like coconut, but when it came out and she tried it, she loved it -- the coconut was very subtle and was nice and crispy. Staff from the whole building visited the kitchen, as the aromas of the granola got everywhere. Which makes me wonder about ventilation....

The next two recipes were done at the same time, as they both involved frying in a pan. The students had only ever made pancakes from a mix, and the french toast they had made at home was always disappointing because it was leaden and hard, probably due to the kind of bread they were using.

FRENCH TOAST

Yield: 4 servings
Milk 1 quart
Eggs 8 each
Sugar 2 oz
Cinnamon, ground pinch
Nutmeg, ground pinch
Salt pinch
Clarified butter, for frying as needed
Challah bread, sliced 12 slices
  1. Combine the milk, eggs, sugar, cinnamon, nutmeg and salt, and mix them into a smooth batter. Keep this batter refrigerated until ready to use.
  2. Heat a sauté pan over moderate heat, add the butter.
  3. Dip the slices of bread into the batter, coating the slices evenly. Fry the slices on one side until evenly browned. Turn them and brown the other side.

PANCAKES
Yield: 4 servings
AP flour 24 oz
Sugar 3 oz
Baking powder 1 tbsp
Salt 2 tsp
Baking soda ½ tsp
Milk 24 floz
Eggs, lightly beaten 3 each
Butter, melted 2 oz
Canola oil as needed
  1. Sift together the flour, sugar, baking powder, salt and baking soda into a large mixing bowl.
  2. In a separate bowl, whisk together the milk, eggs and melted butter.
  3. Make a well in the center of the dry ingredients and pour in the milk and egg mixture.
  4. Lightly whisk the dry ingredients into the wet, stirring until just combines.
  5. Heat a large sauté pan or the flat side of a griddle over medium heat.
  6. Brush lightly with the canola oil.
  7. Ladle the batter into the center of the pan using a 4 ounce ladle
  8. Cook the pancake until the underside is brown, the edges begin to dray and bubbles begin to break the surface of the batter.
  9. Turn the pancake and cook until the second side is brown.
Both turned out great. The french toast was light, fluffy, creamy, crunchy, all at once. The pancakes will rich and pillowy. We had real maple syrup on hand, but one student insisted on going into the school supplies to get some "pancake syrup", and insisted that it tasted better. Both my supervisor (pictured above) and myself were a bit horrified and amazed, and had to take a picture. You can lead a horse to water....

Not sure what we're cooking next week, but I'm leaning to Italian...

Wednesday, May 5, 2010

Chinese Take Out, Made In

The kids all know and like, if not love, Chinese take out. It's cheap, it's available, it's filling, and strongly flavored. Outside the fact that it's "Chinese" and tends to be made in shops with Asian people in it, there is not too much deep knowledge going on.

I started the class with a story about my friend Sonja, a Brit who liked to travel and have adventures, and when she got married, she and her husband decided to have the trip of a lifetime for their honeymoon. They flew to Hong Kong, took a train out as far as it would go, then took a bus even further, then hitch hiked further, then the roads ended, and they hiked into the countryside, where the villages are connected by foot paths.

As you can imagine, there is no hotel, no restaurants, no running water. In the villages, you are invited to sleep in the barn of a farmer, and the village came out for a communal meal to welcome their odd, foreign guests. Sonja & hubby remember being served, with great pride, a plate of white rice topped by a whole, roasted and crispy field mouse. This was the best the village had to offer, and it would have been poor form to do anything but eat it with great smiles and gusto. Suffice to say, Sonja lost a lot of weight on her trip. And after the mouse, they turned back and headed home.

Part of the character of Chinese and Asian cooking is the use of all sorts of sources of protein and food, and nothing is wasted. Such a large country with so many mouths to feed and limited resources -- being resourceful is job #1 of the chef. Multiply that with 1000s of years to develop a cuisine, and it was inevitable something interesting would emerge.

I presented the students with smells of the different soy sauces, oyster sauce, rice wine, rice vinegar and of course stinky fish sauce, all part of the artillery that Asian chefs use to make plain stuff extraordinary.

I broke up the students into two teams -- one did the pork dumplings and pad Thai, the other did the scallion pancakes and the chicken & broccoli. There was some resistance from the students: despite knowing and loving much of the menu, the recipes seemed to be....so long and full of words. There's few things more annoying in life than taking the time to go over a recipe with a student step by step, and when it's time to get started, they first thing they ask is what is the first thing they need to do.

The pork dumplings went well, though upon tasting, adjusted with a little bit more soy sauce, sesame oil and rice wine.

PORK SHAO MAI

Yield: 60 dumplings
Pork, ground 2 lbs
Gingerroot, minced 3 tbsp
Scallions, mostly green, minced 4 each
Rice wine 1 tbsp + 1 tsp
Soy sauce 1 tbsp + 1 tsp
Sesame oil 1 tbsp + 1 tsp
Egg whites 4 each
Cornstarch 3 tbsp
Water chestnuts, fine dice ¼ cup
Thin round dumpling skins 60 each
  1. Hand mix pork, ginger, scallion, rice wine, soy sauce, sesame oil, egg white and cornstarch. In batches, place mix in a food processor. Pulse to mix further, then puree.
  2. Once the entire batch in pureed, fold in the water chestnuts. Chill until ready to use.
  3. Place approximately 2 tsp of the filling in the center of a wrapper. Bring sides up and push/pleat sides together so that the dumpling has an “Empire waist” and some of the filling pushes out the top. Place the shao mai on a cookie sheet and cover with a damp cotton towel until you are ready to steam them.
  4. Place enough water into a wok or pan so that it comes up to inch below the steamer basket. BTB. Open the steamer and arrange the dumplings in the steamer basket with space between them. Steam until meat is cooked through, about 5 to 8 minutes. Serve immediately with dipping sauce.
The pad Thai came out surprisingly well. The thing about this dish (and the Chicken & Broccoli) is that it's a stir fry -- it's pretty fast in the cooking, all the work is in the mise en place, getting all the components together.

PAD THAI

Yield: 8 entrée portions
Fettuccine-width rice stick noodle 1 lb
Peanut oil 1 cup
Tamarind paste 1 cup
Honey 1 1/3 cup
Fish sauce 1 cup
Rice vinegar ½ cup
Red pepper flakes 2 tsp, or to taste
Chopped scallions 1 cup
Garlic cloves, minced 4 each
Eggs 8 each
Nappa cabbage, shredded 1 head
Mung bean sprouts 2 packs
Peeled shrimp and/or pressed tofu 2 lbs
Cilantro, chopped 1 cup
Peanuts, chopped 2 cup
Limes, quartered 8 each
  1. Put noodles in a large bowl and add boiling water to cover. Let sit until noodles are just tender; check every 5 minutes or so to make sure they do not get too soft. Drain, drizzle with a small amount of peanut oil to keep from sticking and set aside.
  2. Put tamarind paste, fish sauce, honey and vinegar in a small saucepan over medium-low heat and bring just to a simmer. Stir in red pepper flakes and set aside.
  3. Put remaining oil in a large wok over medium-high heat; when oil shimmers, add scallions and garlic and cook for about a minute. Add eggs to pan; once they begin to set, scramble them until just done. Add cabbage and bean sprouts and continue to cook until cabbage begins to wilt, then add shrimp or tofu (or both).
  4. When shrimp begin to turn pink , add drained noodles to pan along with sauce. Toss everything together to coat with tamarind sauce and combine well. When noodles are warmed through, serve, sprinkling each dish with peanuts and garnishing with cilantro and lime wedges.
I never made this recipe before, and was happy how authentic they came out. One student who claimed to hate any kind of onion said that she really liked these, because the scallions were subtle.

SCALLION PANCAKES

Yield: 4 thin 8” round breads
DOUGH
AP Flour 9 oz
Baking Powder 1 tsp
Salt 1 tsp
Cold Water 5 to 6 oz

PREPARATION
AP flour for dough rolling as needed
Toasted sesame oil as needed
Scallions, thinly sliced, all white and a little green 2 bunch
Kosher salt as needed
Vegetable oil for pan-frying as needed
  1. Add flour, baking soda and salt to the work bowl of a food processor and pulse to combine. With processor running add water slowly until dough forms a bowl
  2. Remove the dough and knead into a ball with the heel of your hand until “earlobe soft”, 1 to 2 minutes. Coat the dough in sesame oil and place in a bowl covered with plastic wrap to rest for 30 minutes to 1 hour at room temperature.
  3. Turn the dough out onto a very lightly floured board and knead until smooth, about 1 minute. Divide into 4 equal pieces and keep one covered with plastic wrap so it does not dry out. Roll out the balls of dough into 4 1/8” thick rounds.
  4. Brush these well with sesame oil and sprinkle evenly with scallions and salt. Roll up the circle into a cylinder – not too tight or too loose. Pinch the ends shut. Wind this cylinder into a flat, round spiral. Press this to flatten and roll out to about 8” diameter. (THINNER is definitely better for this bread.) Keep the breads covered until you cook them. (If they become too rubbery and hard to roll out, simply cover and wait 15 minutes. The gluten will relax.)
  5. Heat a heavy skillet. Add oil to the depth of 1/8”. When oil is hot, add the bread – it should sizzle. Cover and cook over moderately low heat, shaking the pan occasionally, until the bottom of the bread is golden, about 2 to 5 minutes. Check frequently.
  6. Flip the bread over and add more oil if necessary. Cover and cook again, shaking the pan occasionally, until the remaining side is golden, about 3 to 5 minutes. Slide the bread onto a cutting board and cut into pie-shaped wedges. Sere immediately
We used a Thai Jasmine rice for this, and it came out perfect. Nice and sticky, flavorful, everyone agreed they wished when they ordered take out, the white rice would come like this.

CHINESE LONG-GRAIN PLAIN BOILED RICE

Yield: 10 servings
Long-grain white rice 4 cups
Water 8 cups
Salt 1 tsp
  1. Wash rice well with cold water. Drain. Put rice and 7 ½ cups water into heavy sauce pan. Add salt, bring to boil.
  2. When water boils, lower heat to a simmer and cover. Cook 15 minutes, no more. Turn off the heat and quickly pour the extra half cup of water in around the edges of the rice. Then cover and don’t touch, uncover, stir or move the rice or pot. Just leave it to steam for another 10 minutes.
  3. Uncover the pot and fluff the rice with a fork. Fluff onto a serving platter or bowl. Try not to mash or break the grains.
This was the most complicated recipe of the day, involving a lot of mise, and several times of using the wok, cleaning it out then using it again on different components before doing the final thing. The final result was really good, but the broccoli was a little over cooked and we should of doubled up on the sauce...

CHICKEN WITH BROCCOLI

Yield: 8 entrée size portions

Chicken breasts, 1” cubed 2 lb
Egg white 2 each
Cornstarch 2 tbsp
Salt ½ tsp
2 tablespoons oyster sauce 4 tbsp
Light soy sauce 2 tbsp
Dark soy sauce 2 tbsp
Water 2 tbsp
Broccoli 2 lb
Water 1 cup
Salt ½ tsp, or to taste
Sugar 1 tsp, or to taste
Garlic cloves 4 each
Cornstarch 2 tsp
Water 2 tsp
Peanut oil 5 cups
  1. Mix together egg white, cornstarch and salt. Add mixture to chicken cubes, coat evenly. Marinate the velveted chicken in a sealed container in the refrigerator for 30 minutes.
  2. Prepare the sauce: mix together the oyster sauce, light soy, dark soy, and water in a small bowl and set aside.
  3. Prepare the thickener: mix the cornstarch and water thickener and set aside.
  4. Prepare the vegetables: wash and drain the broccoli. Cut the stalk diagonally into thin slices. Cut the florets into 3 or 4 pieces. Crush the garlic.
  5. Preheat a wok. Heat 2 cups oil in the wok until it reaches 275 degrees Fahrenheit. (Test the heat by placing a piece of chicken in the wok - it should float). Add the chicken cubes, and let cook until they just turn white (about 30 seconds), using a wooden spoon or chopsticks to gently separate them. Quickly remove the chicken cubes from the wok as soon as they turn white, and drain in a colander or on paper towels.
  6. Drain the oil out of the wok or preheat a second wok on medium high to high heat. Add 2 tablespoons oil. When the oil is hot, add the crushed garlic and stir fry for 10 seconds.
  7. Add the broccoli, sprinkle the salt and sugar over, and stir fry briefly, turning down the heat if necessary to make sure it doesn't burn. Add the 1/2 cup water, and cook the broccoli, covered, for 4 - 5 minutes, until it turns a bright green and is tender but still crisp. Remove from the wok and drain.
  8. Clean out the wok and heat 2 more tablespoons oil. Add the broccoli and the velveted chicken, stirring and tossing to cook the chicken through. Add the sauce and cornstarch mixture in the middle of the wok and stir quickly to thicken. Mix everything together and serve hot over steamed rice.
Next week, breakfast foods!

Wednesday, April 28, 2010

Sugar All Around

Today was the first completely new lesson of this round. The semester was two classes shorter last time, and we dedicated two classes to Thanksgiving. While one could argue this lesson deviates from our mission to teach how to cook with nutrition in mind, one also must be a realist -- we eat sweets, even if our bodies don't need them to live, because they are delicious. Better to eat sweets that are made by your own hand than by the industrial complex.

Cheesecakes take a long time to bake -- after baking off and cooling the crusts, the filling must go into a hot 475 degree oven for 10 minutes before being turned down to 200 degrees for two hours, then sitting in the turned off oven for another hour. Why? It's all about getting all the eggs in the recipe setting without getting tough, to get that unbelievably silky cheesecake texture, rather than bits of cheese sitting in little granules of scrambled eggs...

NEW YORK CHEESE CAKE

Yield: 3 Cakes, 48 servings
Butter, melted 2 cup
Graham cracker crumbs 4 cups
Sugar ¼ cup

Cream cheese, softened 5 lbs
Sugar 3 ½ cup
AP Flour ¼ cup
Eggs 10 each
Egg yolks 4 each
Vanilla 2 tbsp
Orange zest ½ each
Lemon zest 1 each
Heavy cream ½ cup
  1. Preheat oven to 400 degrees. Grease 3 10” spring form pans, line with parchment. Bring a large pot of water to a boil.
  2. Make the crust: Combine butter, graham cracker crumbs and sugar. Spread to the edges of the pan. Prick all over with a fork, bake 15 minutes. Allow to cool.
  3. Increase over to 475 degrees. In a large bowl, combine cream cheese, sugar, flour, whole eggs, egg yolk, zests and vanilla and mix thoroughly. Add cream and mix only enough to blend.
  4. Place boiling water in a pan that will fit on the bottom of oven. Pour filling over crust and bake for 10 minutes at 475 degrees. Reduce temperature to 200 degrees and continue to bake for 2 hour. Turn off oven and leave cake in for another hour. When done, it may look a little jiggly in the center.
  5. Chill overnight.
So when the kids arrived a little after 3, instead of waiting until 3:15 to lecture, I grabbed them as they came in and started them on the cheesecake. The first tow just did the crusts, greasing pans, processing cookies, melting butter, cutting parchment and getting it into the oven. I had two teams of two each make a half batch of cheesecake batter in the mixers. It's amazing that even though the recipe is basically throw everything in the mixer EXCEPT the cream, I had to catch one of the teams about to throw the cream in before turning the thing on. During this lesson, when asked simple questions, a lot of the time I said, "The answer is in the recipe, you just need to read the recipe before touching anything."

While the crusts baked, we quickly cleaned then sat for a lecture. And being that today was about sweets, the lecture was primarily...a chocolate tasting!

To paraphrase Tropic Thunder, we were in danger of going "full retard", but I stopped myself from serving 100% baking chocolate, which is bitter and painful to eat straight. I put out a spread from 86% down to white chocolate, and two milk chocolates -- a Giradeli and a Hershey's.

Chocolate is made from the cocoa bean, the seed of the fruit of the cacao tree. It must be 'conched', or processed by grinding into a paste called "chocolate liquor". This is pure chocolate, which can be processed into bars. 100% chocolate liquor is baking chocolate, and as you add sugar, it becomes dark chocolate. A 65% chocolate content means that the bar is about 35% sugar. Chocolate liquor is basically made up of two things, the cocoa which can be processed out into a dry cocoa powder (good for drinks, deepening the flavor of baked goods) and cocoa butter, the fat of the liquor. White chocolate is not actually chocolate at all, as all the cocoa (the flavor of the chocolate) is all removed -- it's just cocoa butter and sugar.

The kids hated the darkest chocolates, too bitter and it made them screw up their faces. The darkest most seemed to like was the 50%. The two milk chocolates were a revelation for them -- they were all used to the Hershey's style of slightly sour-milk flavored chocolate, but when they tasted the other high quality milk chocolate, I really got them talking about why it was better. It melted smoother in the mouth, it was less sweet and more chocolaty in a mellow way. One put it, "It just tastes more elegant!"

As they gobbled the rest of the not-too-dark chocolate, I spoke to the importance and reasoning behind creaming butter and sugar, when a recipe calls for the butter and sugar to be put into a mixer and paddled until it's, well, creamy. Creaming allows the fat of the butter to envelope every grain f sugar, while taking in millions of tiny air bubbles that will end up in the final product. When all these millions of air bubbles get into the oven, the air expands and makes everything more light n' fluffy.

To take in air, the butter most be soft at room temp, not hard and not melted. Sugar firms it up, by just beating the butter alone you'd get very very delicate bubbles that would dissipate with the addition of other ingredients. Using vegetable shortening will get you a lighter, fluffier product because unlike butter, it's 100% fat, but then you won't get the great flavor of butter.

From here I had two students do the donuts and glaze, and two teams of two do the chocolate chip cookies. The cookies were the standard Toll House chocolate chip cookie recipe, and yet the two batches came out quite different...


CLASSIC CHOCOLATE CHIP COOKIES

Yield: about 16-24 cookies
AP Flour 2 ½ cups
Baking Soda 1 tsp
Salt 1 tsp
Butter, softened 1 cup
White sugar ¾ cup
Brown sugar ¾ cup (firmly packed)
Eggs, room temp 2 each
Vanilla extract 1 tsp
Chocolate chips 12 oz
  1. Preheat oven to 375 degrees.
  2. Combine flour, baking soda and salt in a bowl.
  3. In a mixer, beat butter, white sugar and brown sugar until creamy.
  4. Add the eggs one at a time, beating well after each. Beat in vanilla.
  5. Turn off mixer. Gently beat in flour mixture and chocolate chips with a spatially until just combined.
  6. Spoon rounded tablespoons of dough on a parchment lined baking sheet, a few inches apart. Bake 9-11 minutes until golden brown. Cool for 2 minutes, then transfer to wire rack to cool completely.
After I blathered in my lecture about why we cream, why creaming is important, etc etc, one of the two teams added an egg to the creaming butter and sugar. To the left of the pictures are light, cookie-looking cookies. To the right are smooth rock-like orbs, much tougher due to the egg-proteins developed into long strands.

I had never made donuts before, and teaching students how to make them is not the ideal situation to learn, but hey, whataya gonna do -- I don't typically bring a few gallons of hot lard to scalding temps in my kitchen to make many dozen donuts...

CINNAMON SUGAR CAKE DONUTS

Yield: 24
AP Flour 4 cups
Sugar 1 cup
Salt 2 tsp
Baking Powder 2 tbsp
Cinnamon 1 tbsp
Nutmeg ½ tsp
Butter, melted ¼ cup
Milk 1 cup
Eggs, beaten 2 each
Oil for frying
Sugar enough for dredging
Cinnamon enough for dredging
or
Vanilla glaze enough for dipping
  1. Heat oil in appropriate vessel to 375 degrees.
  2. In a large bowl, sift together flour, sugar, salt, baking powder, cinnamon and nutmeg. Mix in butter until crumbly. Stir in milk and egg until smooth.
  3. Knead lightly, then turn out onto a lightly floured surface. Roll or pat to 1/4 inch thickness. Cut with a doughnut cutter, or use two round biscuit cutters of different sizes.
  4. Carefully drop doughnuts into hot oil, a few at a time. Do not overcrowd pan or oil may overflow. Fry, turning once, for 3 minutes or until golden. Drain on paper towels.

VANILLA GLAZE

Yield: about 2 cups
Powdered sugar 1 ½cups
Milk 2 ½ tbsp
Salt ¼ tsp
Vanilla extract ½ tsp
Butter 1 tsp
  1. Melt butter then add rest of ingredients. Mix until creamy
A gallon of peanut oil met with a few pounds of solid beef lard and with a thermometer, got it up to about 400 degrees (the donuts would bring the temp down to 375). The dough of the donuts were pretty straightforward to make, and rolling and cutting was simple. The frying, on the other hand, was a bit tricky.

The quarter inch rounds pretty much expand into donut-shape pretty quickly, then you go for the color you need. We did about 3 minutes on each side, and it was clearly over-cooked -- very crunchy, almost no chew in the middle. The finesse of this procedure is to make the donuts the right size consistently (we were using a combination of round cookie cutters, and getting all sorts of shapes) and a consistent heat of oil.

The sugar was fine, but we didn't make enough glaze, which was the most popular. By the time we sat down to eat cookies and donuts with milk (the cheesecakes were cooling, will have to be for next week), the kids were coming down from the chocolate high and weren't that hungry, he he he.

Next week, another new lesson -- explorations in Asian cuisine.

Thursday, April 22, 2010

Meat, it's what's for the Lesson


Once again, we had 3 hours to teach the students about the entire world of red meat. I started with asking why people are vegetarians -- answers were "don't like the taste" and "they like animals." I broke it down into two categories -- ethical and health, and would not address the 1st, as this is a cooking class, not a philosophy class. If your going to work in a restaurant 98% of the time you're going to have to deal with meat.

Health is another story. Today we were working with chopped meat, one of the most dangerous meat products out there. I explained the process of unhealthy, overcrowded cow pens in industrial farms, how they are forced to eat grains instead of hay, the use of antibiotics to keep them well, and the act of slaughtering is so fast that when the carcasses are cleaned, some poo remains. If you have a solid piece of muscle (like the pork chops we would be cooking), it's a relatively simple task to clean the meat at some point in production -- all the bad stuff is at the surface.

But if you send the meat to the grinder, all the bad stuff is mixed up all the way through. There are limited ways to make the meat clean now -- you can treat it with ammonia, but that stinks and destroys the meat's flavor. You can cook it thoroughly to kill all bacteria, but the fat runs out and you have tough, crumbly cooked meat with little flavor.

So you can do what McDonald's does -- take this crappy, cheap ground meat and add fillers to soften and give flavor to the meat, typically soy product and bean gums. And to a certain extent, that's what we'd be doing today with our meatballs (recipes here) -- adding things to the chopped meat so that it would still be delicious after being cooked at a fiery 550 degrees.

We set to work on making the meatball mix, a traditional spaghetti sauce and a sheet of polenta. Like last semester, the polenta failed -- we didn't have to to saute it, and it just looked and tasted unappealing. This time we used a big enough pot, and the pasta cooked correctly, but we let it go for the minutes on the package and was a tad too soft -- should of cut back by 2 minutes. The sauce was great, but not enough of it. The meatballs, well, Louis from the restaurant where I got the recipe recommended doubling the bread, but the meatballs came out TOO soft and mushy, despite being well done.

Lastly, I had the students saute pork loin chops in a pan, getting a nice brown fond on the meat and the pan before resting the meat on a rack, then making a simple pan sauce in the pan with wine, shallots, stock, salt and finishing with butter. The chops and the sauce went down surprisingly well.

Next week, a new lesson -- pastry.

Thursday, April 15, 2010

Pizza Pizza


Pizza. It's my specialty, and today's class was just about that. We were also feeding parents, who were coming to school to fill in some sort of survey, so the production of enough food to feed about 50 mouths were also on the agenda.

Alas, this was the lesson for bread in general, so I began by speaking a little bit to yeast and gluten. Yeast are these neat little bacteria that can be stored stably at room temp, but when you give them a combination of water, warmth and food (the sugars in flour or, umm, sugar), and they eat and poop out CO2, the gas that makes things puff up when baked. That which is puffing is defined by the proteins in the flour called gluten -- the more gluten you have, the firmer, tougher hole structure the bread will have. Less gluten, you have more tender, looser hole structure like for cake or wonderbread.

The lesson was rather straight forward. Make the dough, let it rest and rise for an hour while prepping the toppings. Stretch dough, top, bake, serve. It was nice that there was a good variety of tasks to keep every one hopping, and cleaning. I brought in two pizza stones for the convection oven, but the pilot lights on the two conventional ovens were out so we had a bit of a pinch point in our production. We produced about 30 pies, some of surprisingly good quality, some of pretty laughable  looks. One student could not get the hang of stretching, and bungled 4 in a row and wanted to give up. I told her we made extra on purpose, and that she should just keep going. And she did, and the 5th was fine. I told her I wanted to smack her hard, in a good way. 

I went on a bit about how less is more, how a properly stretched pizza skin can not accept too many topping without it becoming a soupy mess when it hits the plate. I also stressed the importance of keeping the pizza peel dry, or the pizza would stick and create an ungodly mess. A few times they left the pizza on the board too long and I showed them how to lift up an edge and blow, unsticking the raw skin. Funnily enough, no one's pizza died except for the very last one, where the student built her pie on a damp peel.

Undecided what to cook next week. On the sign in sheet, got some nice feedback, tho: 

Thursday, April 8, 2010

Last Minute Risotto

I got a phone call a few hours before class was to begin -- the freezer had stopped functioning sometime over Spring break, and was at about 100 degrees when discovered. Our large pot of extra-concentrated chicken stock (and the lovely fat that rose to the surface) was now a bacteria cesspool, having easily been in the danger zone for what could be a week. I suggested to my supervisor that he go purchase a few gallons of sodium-free chicken broth and a pint of either chicken or duck fat.

The fat was a no-go, so I decided to simply eliminate the kasha varnishkes recipe this time around. However, when I checked in the groceries about 30 minutes before class, there was no farro, a grain kinda central to the Farro & Sausage dish...not an easy ingredient to source at the last minute. On top of that, with 90+ degree unseasonable Spring weather, was not expecting a big student turnout. I suggested to my supervisor that we cancel, but he politely declined and suggested subtly it was up to me to pull something out of my butt....so....

Today is grains. We had the ingredients to do a simple pilaf using long grain rice, need at least one more recipe. Got all the other components of the farro & sausage.....sausage, fennel, potatoes, beans, tomatoes, stock....in the cupboard, found a couple of boxes of arborio rice: risotto! The risotto method is something that is very hands-on, and can repurpose the main farro ingredients....but I have no written recipe for the students to follow. I guess they're going to have to be real cooks, and wing it by vibe, under my tutelage....

Only three students presented themselves, making it much more possible to teach a hands-on method without a recipe. A brief lecture about what a grain is (the combination dried fruit/seed of a cereal grass) and what they are (wheat, corn, oat, rice etc), the parts of the grain (inedible husk on the outside, the bran that makes brown rice brown and has vitamins and fiber, then the starchy endosperm, then the core germ, where the rest of the vitamins and the fat is. An explanation of long grain versus short grain (light fluffy separate grains vs starch sticky grains) got us into the hands on of making a simple rice pilaf.

We made the rice pilaf with long grain Thai jasmine rice, sauteing onion in butter, sauteing the rice, covering with stock in equal amounts, adding a few herbs, then baking covered for 20 minutes. I thought it came out perfect - firm with nice chew, fragrant and flavorful, but all the students agreed that it was too tough and tasted too mild. Oh well.

To work without a recipe, I made the three students mise everything and have everything in front of them before starting -- they could not start, as they had no instructions in front of them to jump ahead. Chopped onion, chopped fennel, hot Italian sausage crumbled and browned, pound of Parmesan grated, 1 cup of arborio rice measured, sautiors and wooden spoons and stock at the ready.

We set up four pans, and basically had the three students do as I did. Olive oil in the hot pan, enough to just sloosh around to get the bottom wet. When it shimmered, throw in a fist of onion and a fist of fennel. Move around until translucent and smelly, a little salt to get it moving. Toss in one cup of white wine from a measuring cup, as pouring directly from the bottle is a fire hazard. Start stirring constantly as you toss in cup of rice, blast heat. When the wine has been evaporated/absorbed by the rice, add about a cup of stock and stir until rice is almost dry. Repeat adding stock by the cup and stirring until the grains of rice are tender enough, and a starchy sauce has formed from starch coming out of the rice and the stock. This took about 25 minutes. When we got it where we wanted, turned off heat, threw in about 1/4 pound of grated parm and about 4 oz of marscapone, and 1/2 pound of the browned sausage. Stir to completely combine, taste and season with salt and pepper. Serve immediately.

No real measurements, just looking at how your food behaves and cooking until done. One student was impressed by how it looked like rice pudding and added a bit of powdered sugar to hers, another student burned her onions and fennel a little, and her risotto had a reddish-brown tinge. The cooked wine sent a fennel-onion perfume through out the building and we had a bunch of staff stop by to compliment the students on something smelling wonderful.

Surprisingly, all three students were gaga over the risotto, eating large portions and asking, "Can you order this in a restaurant?" among other things.

Next week, making pizza for about 50 staff and parents....

Monday, April 5, 2010

Norbert Monday (Strengths, Weaknesses)

I had some crazy idea that being it's Monday, I'd try for an all-green day, but the social meal of the day knocked me out with sweets and alcohol.

Did my first whole weight-work out this morning, felt a little feeble but it was fun with the music and the Edie observing from her crib. Improvised a potato salad with stuff laying around the kitchen, then attended a baby's birthday party. Edie was feeling awfully clingy, crying every time I put her down for the first hour, but she loosened up. Good thing I love holding her! Afterwards met up with B and walked home, rode out to Coney and back. Feel good.

AM SNACK: 9am, glass of iced mint green tea

BREAKFAST:
10:30am, crispy brown rice cereal with organic dead milk, .5 bowl, hunger 4/5

AFTERNOON TASTING: 12:30pm, bites of potato salad
Made a batch of potato salad for a kiddie party attending this afternoon, using stuff laying around the house. Bag of red bliss mini potatoes, egg yolks & olive oil with some mustard powder to make mayo, fresh rosemary, parsley, carrot and celery, salt, Worcestershire, some hot pepper, voila, potato salad...

PM SNACK: 1:30pm, large green salad, 1 bowl, hunger 4/5

LUNCH: 3pm, 2 wedges of eggplant and zucchini hero, bits of industrial potato salad, macaroni salad and some of my own potato salad, 1 brownie, 1 piece of carrot-cream cheese cake, 1 glass wine, 1.5 bowl, hunger 4/5
At a 1 year-old's birthday party. They had a several feet of vegetarian hero and some bland sides, to which my potato salad sat with. Funny, the industrial potato salad was bone-white and was simply potato slices in loose white mayonaisy blandness. My potato salad was a rich yellow color (from the yolks in my mayo), studded with crunchy bits, herbs and the loose red skins coming off the quartered potatoes.

DINNER: 9pm, baked ocean perch, sofrito brown rice & beans, smoothie pop, water, 1.25 bowl, hunger 4/5
Got a frozen fillet of perch, sprinkled a bunch of old bay seasoning and wacked it in the oven -- before c-school, I'd be too intimidated to just cook a simple piece of fish without instructions, now it seems ridiculously easy.

Thursday, March 25, 2010

Mac n' Cheese Marathon


The class was psyched for today's lesson -- everyone loves mac n' cheese, and we were going to make three versions. The point was to get them thinking about sauces. It's one thing to lecture about mother sauces (which I did, which did not elicit much interest), it's another thing to make a sauce and apply it in real life.

Mac n' cheese is not just macaroni slathered in cheese -- if we did that, and baked it, you'd get a dry, burnt, excessively lumpy mass that would congeal and room temperature to something guaranteed to back you up (at the least.) That thing that makes a mac n' cheese something more is the sauce: Bechamel, a mother sauce which is white sauce made by thickening milk with a white roux. A roux is the classic thickening agent that is made by cooking equal parts fat and flour (in this case, butter and AP.) Once we have our bechamel, we add out cheeses and seasonings (see the recipe here), then into a pan with very stiffly cooked macaroni to bake and come together.

Traditionally, the seasoning is salt, pepper and mustard powdered, and that's what we did with one version. Another version we added crumbled bacon and extra mustard powder, and a third replaced the mustard with jerk seasoning and a bunch of softened diced onion.

This is not light food, so I thought rather than make another heavy sauce dish, make a protein and a veg to make a balanced plate of food. I got one student to just go for it, sauteing a bag of adult spinach leaves. Super simple: heat saute pan, add a little olive oil, drop in dry leaves, move around until wilted, then add more until it's all in pan. Salt while cooking to taste. Stop and remove from heat when all is wilted.

The protein was "shake n' bake" chicken. Simply, take chicken breasts cut to size and dredge in a flour and spice mix, then bake.

HOME MADE “SHAKE N’ BAKE” CHICKEN BREASTS

Yield: 8 servings
Flour 1 cup
Corn meal ½ cup
Old bay seasoning 2 tsp
Paprika 2 tsp
Black pepper 1 tsp
Salt 2 tsp
Chicken breasts 8 each
1. Grease baking sheet. Preheat oven to 350
2. Combine all ingredients except breasts in a bowl
3. Toss breasts in mixture then place on greased sheet.
4. Bake for 25-30 minutes or when meat thermometer reads 155˚.
5. Rest meat for 10-15 minutes covered in foil, then serve.

Old Bay Seasoning is basically celery salt and paprika, and the final result was surprising like the commercial shake n' bake mix, only without the extra chemicals or anti-caking agents.

The kids were not impressed with the chicken -- they liked the seasoning, but it was too "dry" for them (though due to the instant read thermometer, the bigger pieces did come out juicy, the smaller pieces were a bit tough.)

However, there was universal acclaim for the spinach. None seemed to ever have a simple spinach like this, done fresh -- usually, if at all, they've had it from frozen. I think a few kids said they're going to make that at home, which really made me feel like today's class wasn't JUST a fat n' carb festival.

We also made a vat of chicken stock, which will factor in to the next lesson: grains, including rice, farro and buckwheat...

Friday, March 19, 2010

Shrimp Poo


We skipped any lecture to review the recipes quickly then, got straight into it. The first thing was shrimp for the Shrimp Louis. Everyone got a pound or so of jump shrimp, and I showed them the proper way of deshelling -- tail first, trying to preserve the tail meat. Then the rest of the exoskeleton can be pretty much easily removed. Then the back of the shrimp is cut with a pairing knife, about 1/4 inch deep, and the vein a.k.a. the intestine is removes. Most shrimp are starved for a day or two before processing so the intestine is empty, but occasionally you'll get a swollen blue vein full of sand, grit and purple stuff. Mmmm, shrimp poo!

I broke up the class into three at this point, after wiping down everything, washing the boards and washing hands -- you can never be too careful when dealing with raw seafood. One team of 2 made the sauce for Shrimp Louis (based on the herbed mayo we made yesterday), then made 2 large composed platters, with bib lettuce as the base, the shrimp in the middle, and garnishes like sliced hard boiled eggs and olives all around. The second team did a pasta salad, fusilli dressed in our mayo and grated Swiss, with a lot of vegetable mix-ins, also composed on platters. The third team did a simple Cesar with the dressing made yesterday, and cut up a few loaves of bread and tossed them with melted butter and salt before toasting them in a 450 degree oven for a few minutes.

While that was going on, I pulled on student aside who muffed up brownies yesterday. I pulled all the ingredients out for a batch of brownies, and had her make them on her own. I think he confidence might of been bruised yesterday because of distractions from her disorganized team, so letting her do this seemed like the move....and we can always use more good brownies in this world!

The 10 lbs of shrimp were dropped into a large pot of boiling water spiked with the juice of 4 limes, and after 2 minutes were taken out and placed in an ice bath. Not enough can be said to stress the importance of shocking when boiling shrimp. Few things nastier than rubbery overcooked shrimp.

Once the three sets of salad were out, we cleaned and set up for sandwich making. I spoke a bit about the importance of balance, erring on the side of too-little, folding the fillings so it's not too dense, putting oil-based spreads on the bottom to prevent mushiness, etc. Most of the kids never had prosciutto, which freaked them out when I told them it was aged for months and months instead of being cooked.

Sandwiches were banged out, the salads were out, the brownies presented. On a funny note, someone mistook the clumps of unsifted flour in the gluey mint brownies as nuts:


The kids seemed pretty happy, everyone pitched in with the cleaning, and the staff and parents had the kids come out of the kitchen for minute for a round of applause. Next week, sauces, featuring funked-out mac n' cheese...

Thursday, March 18, 2010

Brownie FAIL

Today was the first half of a two-fer: tomorrow is Parent Teacher Conferences, so we cooked in preparation for setting up a buffet tomorrow. It spring instead of fall, so rather than exactly repeating last semester, we're skipping the mac n' cheese in favor of a lighter pasta salad. (Though now that I think about it, I think I'll do mac n' cheese next week to demonstrate sauces.) Today we finished our vegetable soup, made mayonnaise and Cesar salad dressing, then 3 different kinds of brownies. Recipes can be found earlier on the blog here and here.

We started the class with a little lecture about the brigade system, the traditional organization of the kitchen roles, from Executive Chef to commis (trainee), but I could see the kid's eyes glazing. I did a demo of whisking oil and vinegar alone, and watching it separate, then whisking with a little mustard, and watching it stay set -- a simple emmulsion.

The kids set about processing a whole host of vegetables for the stock we made last week to make vegetable soup, including the the blanched, shocked peeled and scooped out tomato concase. We turned over, and I demoed mayonnaise before setting the kids out in teams to make it themselves. Some of the kids are sharper than others, and when I tried to get them to set up their mise-en-place before I demoed, one kid didn't understand the concept of pouring two oils into the same measuring cup, and didn't understand that mise didn't mean dumping everything into one bowl, but grouping stuff together in a way that makes sense -- the oil and everything else must be in two containers, as the method of making mayonnaise involves a lot of whisking while pouring oil slowly into the bowl.

I had two students that I had last semester go nuts on the Cesar salad dressing, making an evil mash of garlic and sardines, before making the emulsion that would be joined with a lot of Parmesan. Both the mayo and the dressing would be held until tomorrow.

We reset and I broke the class into two teams. One would make normal fudge brownies, one would make a batch with macadamias and chocolate chunks. I demoed with a third batch -- mint brownies. I never tried this method before, I just made it up, and I suspected it would fail, though I wasn't sure how. I replaced the 2 cups of sugar with 2 cups of mint simple syrup -- Boil two cups of sugar with one cup of water, then place a bunch of mint and let it steep for about 30 minutes. The problem is you are adding a cup of water. We tried the brownie immediately after and while it tasted good, it had the tough consistency of jello -- despite minimally folding the flour in, the extra water really developed the gluten to make it very non-flaky and weirdly elastic.

I demoed how to make powdered sugar, simply by putting normal sugar in a blender for a few minutes, and added a few drops of food dye to turn it green, green to sprinkle over the mint brownies and green because it was St. Patrick's day. We sat down to eat the soup and the inferior brownies, and we went around the table discussing what was good and what was bad about today's session. Most mentioned the brownies as a highpoint, despite it tasting inferior. Many mentioned that the soup didn't have enough salt, though it tasted salty to me -- it gave me an opportunity to talk about salt -- it's easy to add more, but impossible to take it away without a lot of complexity. That's why you have salt on the table of restaurants -- it's left up to the customer to season to taste.

Tomorrow, we bang out salads and sandwiches....

Thursday, March 11, 2010

Feel like ch-ch-ch-ch-chicken toniiiite!

For the second lesson of the second semester, I stuck to the recipes and format (see this post for the gory details) but ran the class a lot smoother, ending on time for the second week in a row. We started with the question: what is cooking? It is applying heat to food to change it's nature. Last week we were chopping, mixing, blending, all preparation. That's legit, and there can not be cooking without preparation, but it is not cooking. Last week we prepared. Today, we step up and cook!

But not before preparing. These kids still have no knife skills, so first thing was to whip out 20 lbs of russets and have them cube them off (rather than peel), then make small cubes. Once that was done, I took a few kids to be on potato duty, while the others did soup-chop on a selection of vegetables for stock. The potatoes were boiled, drained, spread on a sheet and baked for a minute to make them perfectly dry, run through a food mill then mixed with an obscene amount of cream, milk, butter and salt. I stopped the class, had everyone come over and had them taste it without salt. Then I seasoned and made them taste it again. I got the "AH HA!" moment I was looking for in the smoothies last week. Loose, creamy and outta sight!

The stock pot got full, covered with cold water and set to boil. After 20 minutes, I showed the class how to make a sachet d'espices (parsley, thyme, bay leaf, cracked peppercorn in a tied-off cheese clothe) and added it to the stock. Last time, I attempted to make vegetable soup in the same session but there wasn't enough time. This time, the stock went into the freezer right after.

Ten heads of Swiss chard were deveined, cleaned and chopped up. I took four students, assigned them one fat (chicken fat, butter, sesame oil and peanut oil) and had them slow saute onion half-moons to soft, then slightly brown. The chard got boiled for a minutes, drained, thrown in ice water for blanching and shocking. Once the onions looked right, we through in the chard, chopped up kalamata olives and adjusted with salt.

It was only 5pm! I made a promise if the kids were to hustle and clean up and we had time, I would show them how to bread and fry chicken breasts properly. I really expected to not do this, but these kids did not have to be ridden to clean up. Once they had finished their tasks, they started cleaning every time. So I busted out 8 breasts, sliced each one in half at a 33 degree angle to kinda keep the thicknesses even. I set up the SBP -- standard breading procedure. First bowl, AP flour. Second, egg wash with whole egg and milk. Third, the breading, in this case wholewheat panko breadcrumbs, AP flour and salt. In a preheated rondeau, dumped about 1/4 of an inch of peanut oil. Once the chicken got dipped in each bowl, using alternate hands to prevent the creation of a batter mitt, the chicken went straight into the oil. Flipped after about 5 minutes, when the first came out I asked them how do you know it's done? Ya take a small knife, make a slit on the underside and you peek into the middle! It looked fully white, but still juicy. One student insisted in looked slightly pink, but it was JUST right. It was probably pink 30 seconds before, but in this state it was still very juicy.

So the meal was pretty complete -- crunchy panko chicken breast, Swiss chard with onion, and whipped potatoes. As we did last week with the time, we went around the table after the main feed was done and said what we liked most and what we liked least about class. Most said the best part was eating. Some kids says there was no bad, which is nice, a few said tasting the kalamata olives were the worst, or the cutting of onions, or wot-not. Compliments all around about the chicken, which was nice. Makes me think I should make something like that, simple but interesting, at home more often.

Next week is salads, both mixed and composed, as well as some additional things, as we'll be cooking for Thursday's PTA conferences, too!

Wednesday, March 3, 2010

I'll be your Ratatouille, if that's what it takes.

So it begins again. For the first class, I stuck close to the original lesson plan, so I won't go into too much details (you can get all the recipes and nitty gritty here.) We had a group of 9 students, including 2 from the last session who are graduating soon, but wanted to hang out and relive the memories. One was in class for the first half of the program, but dropped out because of personality conflicts with another student. I'm glad she's back, she's clearly very intelligent and motivated, but socially a little awkward -- I hope she makes it through this time, and I'll lean on her a little to be a little bit more responsible for things.

First was the lecture about contamination -- physical, chemical and bacterial. Had to inform two girls with long-ass fingernails that they had to either lose them and wear gloves during class, another had to remove her big hangy earrings, others had to tie hair back and put on a hair-covering. A brief explanation of how bacteria travels (contact), and how this understanding was revolutionary -- doctors used to cut people open and use unwashed hands, leaving behind all sorts of bacteria.

I could tell at points during the safety lecture I was starting to lose the interest of the students, but was able to pull them back in with personal, mostly humorous, anecdotes. In speaking of knife safety, in how you must announce yourself while travelling across a busy kitchen with a sharp knife, you must say "Sharp" as you pass. At the last restaurant I worked, a very sweet Afgahni fellow with a limited use of the English language pronounced it as "Shark", and it seemed there was a killer fish wandering around the kitchen whenever it got busy.

We got into the kitchen, washed hands, then I set up a station -- cutting board at the edge of the counter with a wet paper towel under, two knives at twelve o'clock. I showed how to hold a knife properly, then demonstrated on each veg how I wanted them cut for salsa -- tomato, onion, garlic, jalapeno, cilantro. It went well, I went around correcting their grips and consoled the two students crying over cut onions. The best I could recommend is not to hunch over the cut onions, keep your eyes out of the line of fire.

The students from last session jumped in and helped the new kids with knife skills, and helped direct them how to clean up. Surprisingly, the turning over of the kitchen from salsa to smoothies went lickity split -- we turned over, i.e. washed down our stations and reset up, to prevent cross-contamination. One blender walked away, so we were on one blender for 9 students. I demoed one smoothie, and then made a big goof. I wanted to show the importance of salt in increasing/improving flavor, so I divided my smoothie into two cups -- one with salt, one with out. Unfortunately, I way over-salted and it ended up tasting oddly briny.

As the kids got their mise together, they immediately started cleaning while waiting for their turn at the blender. As they produced them, I tasted each, asked them what they thought and why, and commented on salt-level. Some didn't follow the recipe closely enough and made them too thick or too thin, and only one student straight-up disliked their smoothie.

I had my experienced students prep the 10 cheeses for tasting, chop bread and a new student was shown how to slice an apple correctly. (Half it, take out the top and bottom stems with a paring knife, then remove the seeds with a melon-baller) The kitchen was cleaned and we sat down to eat by 5:30, earlier than usual, but gave us time to talk and really get into the cheese tasting.

The cheeses were sharp cheddar, smoked gouda, buffala moz, pecorino romano, morbier, tallegio, brie, marscapone, roquefort and stilton. I explained how the stinky cheese taste much better than they smell, and for the truely foul ones, eating it with a sweet fruit like apple changes everything. As I explained my own experience discovering the delicious smelliness of tallegio, then amping it up by eating it with apples, one student guffawed "Ratatouille!" and a bunch chimed in in agreement. I guess being compared to a food-loving cartoon rat is a good thing. There was a lot of hesitation to trying the cheeses, but when I explained that the smoked gouda kinda tastes like bacon, everyone tried it and all loved it. One kid said it tasted like a Bodega meat stick/cheese stick combo wrapped into one. There was uniform scorn for the blue cheeses, but a few kids liked the ashy wine-subtle smoothness of the morbier, which made me VERY happy.

It was a good start to the session. Next week, more focus on knife skills. We'll make the whipped potatos and vegetable stock, though I may mix it up with the chard, we'll see.