Thursday, March 25, 2010

Mac n' Cheese Marathon


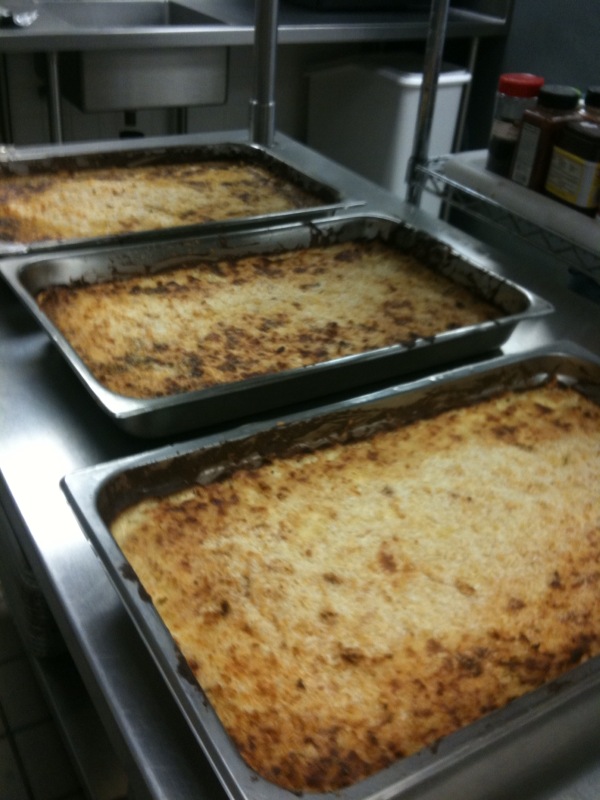
The class was psyched for today's lesson -- everyone loves mac n' cheese, and we were going to make three versions. The point was to get them thinking about sauces. It's one thing to lecture about mother sauces (which I did, which did not elicit much interest), it's another thing to make a sauce and apply it in real life.

Mac n' cheese is not just macaroni slathered in cheese -- if we did that, and baked it, you'd get a dry, burnt, excessively lumpy mass that would congeal and room temperature to something guaranteed to back you up (at the least.) That thing that makes a mac n' cheese something more is the sauce: Bechamel, a mother sauce which is white sauce made by thickening milk with a white roux. A roux is the classic thickening agent that is made by cooking equal parts fat and flour (in this case, butter and AP.) Once we have our bechamel, we add out cheeses and seasonings (see the recipe here), then into a pan with very stiffly cooked macaroni to bake and come together.

Traditionally, the seasoning is salt, pepper and mustard powdered, and that's what we did with one version. Another version we added crumbled bacon and extra mustard powder, and a third replaced the mustard with jerk seasoning and a bunch of softened diced onion.

This is not light food, so I thought rather than make another heavy sauce dish, make a protein and a veg to make a balanced plate of food. I got one student to just go for it, sauteing a bag of adult spinach leaves. Super simple: heat saute pan, add a little olive oil, drop in dry leaves, move around until wilted, then add more until it's all in pan. Salt while cooking to taste. Stop and remove from heat when all is wilted.

The protein was "shake n' bake" chicken. Simply, take chicken breasts cut to size and dredge in a flour and spice mix, then bake.

HOME MADE “SHAKE N’ BAKE” CHICKEN BREASTS

Yield: 8 servings
Flour 1 cup
Corn meal ½ cup
Old bay seasoning 2 tsp
Paprika 2 tsp
Black pepper 1 tsp
Salt 2 tsp
Chicken breasts 8 each
1. Grease baking sheet. Preheat oven to 350
2. Combine all ingredients except breasts in a bowl
3. Toss breasts in mixture then place on greased sheet.
4. Bake for 25-30 minutes or when meat thermometer reads 155˚.
5. Rest meat for 10-15 minutes covered in foil, then serve.

Old Bay Seasoning is basically celery salt and paprika, and the final result was surprising like the commercial shake n' bake mix, only without the extra chemicals or anti-caking agents.

The kids were not impressed with the chicken -- they liked the seasoning, but it was too "dry" for them (though due to the instant read thermometer, the bigger pieces did come out juicy, the smaller pieces were a bit tough.)

However, there was universal acclaim for the spinach. None seemed to ever have a simple spinach like this, done fresh -- usually, if at all, they've had it from frozen. I think a few kids said they're going to make that at home, which really made me feel like today's class wasn't JUST a fat n' carb festival.

We also made a vat of chicken stock, which will factor in to the next lesson: grains, including rice, farro and buckwheat...

Friday, March 19, 2010

Shrimp Poo


We skipped any lecture to review the recipes quickly then, got straight into it. The first thing was shrimp for the Shrimp Louis. Everyone got a pound or so of jump shrimp, and I showed them the proper way of deshelling -- tail first, trying to preserve the tail meat. Then the rest of the exoskeleton can be pretty much easily removed. Then the back of the shrimp is cut with a pairing knife, about 1/4 inch deep, and the vein a.k.a. the intestine is removes. Most shrimp are starved for a day or two before processing so the intestine is empty, but occasionally you'll get a swollen blue vein full of sand, grit and purple stuff. Mmmm, shrimp poo!

I broke up the class into three at this point, after wiping down everything, washing the boards and washing hands -- you can never be too careful when dealing with raw seafood. One team of 2 made the sauce for Shrimp Louis (based on the herbed mayo we made yesterday), then made 2 large composed platters, with bib lettuce as the base, the shrimp in the middle, and garnishes like sliced hard boiled eggs and olives all around. The second team did a pasta salad, fusilli dressed in our mayo and grated Swiss, with a lot of vegetable mix-ins, also composed on platters. The third team did a simple Cesar with the dressing made yesterday, and cut up a few loaves of bread and tossed them with melted butter and salt before toasting them in a 450 degree oven for a few minutes.

While that was going on, I pulled on student aside who muffed up brownies yesterday. I pulled all the ingredients out for a batch of brownies, and had her make them on her own. I think he confidence might of been bruised yesterday because of distractions from her disorganized team, so letting her do this seemed like the move....and we can always use more good brownies in this world!

The 10 lbs of shrimp were dropped into a large pot of boiling water spiked with the juice of 4 limes, and after 2 minutes were taken out and placed in an ice bath. Not enough can be said to stress the importance of shocking when boiling shrimp. Few things nastier than rubbery overcooked shrimp.

Once the three sets of salad were out, we cleaned and set up for sandwich making. I spoke a bit about the importance of balance, erring on the side of too-little, folding the fillings so it's not too dense, putting oil-based spreads on the bottom to prevent mushiness, etc. Most of the kids never had prosciutto, which freaked them out when I told them it was aged for months and months instead of being cooked.

Sandwiches were banged out, the salads were out, the brownies presented. On a funny note, someone mistook the clumps of unsifted flour in the gluey mint brownies as nuts:


The kids seemed pretty happy, everyone pitched in with the cleaning, and the staff and parents had the kids come out of the kitchen for minute for a round of applause. Next week, sauces, featuring funked-out mac n' cheese...

Thursday, March 18, 2010

Brownie FAIL

Today was the first half of a two-fer: tomorrow is Parent Teacher Conferences, so we cooked in preparation for setting up a buffet tomorrow. It spring instead of fall, so rather than exactly repeating last semester, we're skipping the mac n' cheese in favor of a lighter pasta salad. (Though now that I think about it, I think I'll do mac n' cheese next week to demonstrate sauces.) Today we finished our vegetable soup, made mayonnaise and Cesar salad dressing, then 3 different kinds of brownies. Recipes can be found earlier on the blog here and here.

We started the class with a little lecture about the brigade system, the traditional organization of the kitchen roles, from Executive Chef to commis (trainee), but I could see the kid's eyes glazing. I did a demo of whisking oil and vinegar alone, and watching it separate, then whisking with a little mustard, and watching it stay set -- a simple emmulsion.

The kids set about processing a whole host of vegetables for the stock we made last week to make vegetable soup, including the the blanched, shocked peeled and scooped out tomato concase. We turned over, and I demoed mayonnaise before setting the kids out in teams to make it themselves. Some of the kids are sharper than others, and when I tried to get them to set up their mise-en-place before I demoed, one kid didn't understand the concept of pouring two oils into the same measuring cup, and didn't understand that mise didn't mean dumping everything into one bowl, but grouping stuff together in a way that makes sense -- the oil and everything else must be in two containers, as the method of making mayonnaise involves a lot of whisking while pouring oil slowly into the bowl.

I had two students that I had last semester go nuts on the Cesar salad dressing, making an evil mash of garlic and sardines, before making the emulsion that would be joined with a lot of Parmesan. Both the mayo and the dressing would be held until tomorrow.

We reset and I broke the class into two teams. One would make normal fudge brownies, one would make a batch with macadamias and chocolate chunks. I demoed with a third batch -- mint brownies. I never tried this method before, I just made it up, and I suspected it would fail, though I wasn't sure how. I replaced the 2 cups of sugar with 2 cups of mint simple syrup -- Boil two cups of sugar with one cup of water, then place a bunch of mint and let it steep for about 30 minutes. The problem is you are adding a cup of water. We tried the brownie immediately after and while it tasted good, it had the tough consistency of jello -- despite minimally folding the flour in, the extra water really developed the gluten to make it very non-flaky and weirdly elastic.

I demoed how to make powdered sugar, simply by putting normal sugar in a blender for a few minutes, and added a few drops of food dye to turn it green, green to sprinkle over the mint brownies and green because it was St. Patrick's day. We sat down to eat the soup and the inferior brownies, and we went around the table discussing what was good and what was bad about today's session. Most mentioned the brownies as a highpoint, despite it tasting inferior. Many mentioned that the soup didn't have enough salt, though it tasted salty to me -- it gave me an opportunity to talk about salt -- it's easy to add more, but impossible to take it away without a lot of complexity. That's why you have salt on the table of restaurants -- it's left up to the customer to season to taste.

Tomorrow, we bang out salads and sandwiches....

Thursday, March 11, 2010

Feel like ch-ch-ch-ch-chicken toniiiite!

For the second lesson of the second semester, I stuck to the recipes and format (see this post for the gory details) but ran the class a lot smoother, ending on time for the second week in a row. We started with the question: what is cooking? It is applying heat to food to change it's nature. Last week we were chopping, mixing, blending, all preparation. That's legit, and there can not be cooking without preparation, but it is not cooking. Last week we prepared. Today, we step up and cook!

But not before preparing. These kids still have no knife skills, so first thing was to whip out 20 lbs of russets and have them cube them off (rather than peel), then make small cubes. Once that was done, I took a few kids to be on potato duty, while the others did soup-chop on a selection of vegetables for stock. The potatoes were boiled, drained, spread on a sheet and baked for a minute to make them perfectly dry, run through a food mill then mixed with an obscene amount of cream, milk, butter and salt. I stopped the class, had everyone come over and had them taste it without salt. Then I seasoned and made them taste it again. I got the "AH HA!" moment I was looking for in the smoothies last week. Loose, creamy and outta sight!

The stock pot got full, covered with cold water and set to boil. After 20 minutes, I showed the class how to make a sachet d'espices (parsley, thyme, bay leaf, cracked peppercorn in a tied-off cheese clothe) and added it to the stock. Last time, I attempted to make vegetable soup in the same session but there wasn't enough time. This time, the stock went into the freezer right after.

Ten heads of Swiss chard were deveined, cleaned and chopped up. I took four students, assigned them one fat (chicken fat, butter, sesame oil and peanut oil) and had them slow saute onion half-moons to soft, then slightly brown. The chard got boiled for a minutes, drained, thrown in ice water for blanching and shocking. Once the onions looked right, we through in the chard, chopped up kalamata olives and adjusted with salt.

It was only 5pm! I made a promise if the kids were to hustle and clean up and we had time, I would show them how to bread and fry chicken breasts properly. I really expected to not do this, but these kids did not have to be ridden to clean up. Once they had finished their tasks, they started cleaning every time. So I busted out 8 breasts, sliced each one in half at a 33 degree angle to kinda keep the thicknesses even. I set up the SBP -- standard breading procedure. First bowl, AP flour. Second, egg wash with whole egg and milk. Third, the breading, in this case wholewheat panko breadcrumbs, AP flour and salt. In a preheated rondeau, dumped about 1/4 of an inch of peanut oil. Once the chicken got dipped in each bowl, using alternate hands to prevent the creation of a batter mitt, the chicken went straight into the oil. Flipped after about 5 minutes, when the first came out I asked them how do you know it's done? Ya take a small knife, make a slit on the underside and you peek into the middle! It looked fully white, but still juicy. One student insisted in looked slightly pink, but it was JUST right. It was probably pink 30 seconds before, but in this state it was still very juicy.

So the meal was pretty complete -- crunchy panko chicken breast, Swiss chard with onion, and whipped potatoes. As we did last week with the time, we went around the table after the main feed was done and said what we liked most and what we liked least about class. Most said the best part was eating. Some kids says there was no bad, which is nice, a few said tasting the kalamata olives were the worst, or the cutting of onions, or wot-not. Compliments all around about the chicken, which was nice. Makes me think I should make something like that, simple but interesting, at home more often.

Next week is salads, both mixed and composed, as well as some additional things, as we'll be cooking for Thursday's PTA conferences, too!

Wednesday, March 3, 2010

I'll be your Ratatouille, if that's what it takes.

So it begins again. For the first class, I stuck close to the original lesson plan, so I won't go into too much details (you can get all the recipes and nitty gritty here.) We had a group of 9 students, including 2 from the last session who are graduating soon, but wanted to hang out and relive the memories. One was in class for the first half of the program, but dropped out because of personality conflicts with another student. I'm glad she's back, she's clearly very intelligent and motivated, but socially a little awkward -- I hope she makes it through this time, and I'll lean on her a little to be a little bit more responsible for things.

First was the lecture about contamination -- physical, chemical and bacterial. Had to inform two girls with long-ass fingernails that they had to either lose them and wear gloves during class, another had to remove her big hangy earrings, others had to tie hair back and put on a hair-covering. A brief explanation of how bacteria travels (contact), and how this understanding was revolutionary -- doctors used to cut people open and use unwashed hands, leaving behind all sorts of bacteria.

I could tell at points during the safety lecture I was starting to lose the interest of the students, but was able to pull them back in with personal, mostly humorous, anecdotes. In speaking of knife safety, in how you must announce yourself while travelling across a busy kitchen with a sharp knife, you must say "Sharp" as you pass. At the last restaurant I worked, a very sweet Afgahni fellow with a limited use of the English language pronounced it as "Shark", and it seemed there was a killer fish wandering around the kitchen whenever it got busy.

We got into the kitchen, washed hands, then I set up a station -- cutting board at the edge of the counter with a wet paper towel under, two knives at twelve o'clock. I showed how to hold a knife properly, then demonstrated on each veg how I wanted them cut for salsa -- tomato, onion, garlic, jalapeno, cilantro. It went well, I went around correcting their grips and consoled the two students crying over cut onions. The best I could recommend is not to hunch over the cut onions, keep your eyes out of the line of fire.

The students from last session jumped in and helped the new kids with knife skills, and helped direct them how to clean up. Surprisingly, the turning over of the kitchen from salsa to smoothies went lickity split -- we turned over, i.e. washed down our stations and reset up, to prevent cross-contamination. One blender walked away, so we were on one blender for 9 students. I demoed one smoothie, and then made a big goof. I wanted to show the importance of salt in increasing/improving flavor, so I divided my smoothie into two cups -- one with salt, one with out. Unfortunately, I way over-salted and it ended up tasting oddly briny.

As the kids got their mise together, they immediately started cleaning while waiting for their turn at the blender. As they produced them, I tasted each, asked them what they thought and why, and commented on salt-level. Some didn't follow the recipe closely enough and made them too thick or too thin, and only one student straight-up disliked their smoothie.

I had my experienced students prep the 10 cheeses for tasting, chop bread and a new student was shown how to slice an apple correctly. (Half it, take out the top and bottom stems with a paring knife, then remove the seeds with a melon-baller) The kitchen was cleaned and we sat down to eat by 5:30, earlier than usual, but gave us time to talk and really get into the cheese tasting.

The cheeses were sharp cheddar, smoked gouda, buffala moz, pecorino romano, morbier, tallegio, brie, marscapone, roquefort and stilton. I explained how the stinky cheese taste much better than they smell, and for the truely foul ones, eating it with a sweet fruit like apple changes everything. As I explained my own experience discovering the delicious smelliness of tallegio, then amping it up by eating it with apples, one student guffawed "Ratatouille!" and a bunch chimed in in agreement. I guess being compared to a food-loving cartoon rat is a good thing. There was a lot of hesitation to trying the cheeses, but when I explained that the smoked gouda kinda tastes like bacon, everyone tried it and all loved it. One kid said it tasted like a Bodega meat stick/cheese stick combo wrapped into one. There was uniform scorn for the blue cheeses, but a few kids liked the ashy wine-subtle smoothness of the morbier, which made me VERY happy.

It was a good start to the session. Next week, more focus on knife skills. We'll make the whipped potatos and vegetable stock, though I may mix it up with the chard, we'll see.

Friday, February 12, 2010

Teaching, Cycle 2


Hello, everybody! I was at the high school today, recruiting student's for the second semester of culinary classes that I'll be teaching starting in March. Again, I whipped out a batch of brownies based on this recipe, and put them side-by-side with some bodega-purchased Lil' Debbie brownies.

Again, I put this info sheet out:

Spoke to about 15 interested kids. Talking with the supervisor about coming back in a couple of weeks to do a meatball demo class to further recruiting.

Basically, I'll be basing this round of classes on the curriculum I've developed, based on the C-CAP literature, but take it a step further. Now that I've done it once, I kind of know what works and what doesn't, what can be done in how long, etc. Should be interesting!

Wednesday, December 16, 2009

Student's Choice/End of Semester

To close out the semester, the students suggested what they wanted to make. One said pork dumplings, another said fried calamari, the third suggested brownies, to which I steered to the next step up in elegance: flourless chocolate cake. One three students suggesting 2 appetizers and a dessert does not a meal make, so I rounded it out with a dish I wish I had hit up on grains day: risotto.

First up was making the cake. Flourless chocolate cake was trendy a few years ago, but now that everyone has taken a crack at it, people have recognized it for what it is: an extra dense brownie that doesn't have much chew.


FLOURLESS CHOCOLATE CAKE

Yield: 16 small serving
Semisweet chocolate 4 oz
Butter ½ cup
White sugar ¾ cup
Cocoa powder ½ cup
Eggs, beaten 3 each
Vanilla bean, scrapings 1 each
1. Preheat oven to 300 degrees. Grease an 8” round springform pan, dust with cocoa powder.
2. Melt chocolate and butter in a double boiler. Remove from heat, stir in sugar, cocoa powder and vanilla.
3. Stir in eggs. Pour into prepared pan.
4. Bake in preheated oven for 30 minutes. Let cool for 10 minutes, turn out onto a wire rack and cool completely.

This is a VERY chocolaty and rich dessert, requiring something to compliment and mute it's strength. Vanilla ice cream (which I made at home and brought in -- not enough time and not enough equipment to make it at school) is a nice, straightforward companion, but a fruit sauce is also pretty classic.

RASPBERRY SAUCE

Yield: 2 cups
Raspberries 1 pint
White sugar ¼ cup
Orange juice 2 tbsp
Cornstarch 2 tbsp
Cold water 1 cup
1. Combine raspberries, sugar and orange juice in a saucepan. In a separate bowl, whisk cornstarch into cold water until smooth. Combine cornstarch mixture into the sauce pan, BTB RTS
2. Simmer for 5 minutes or so until the desired consistency, constantly stirring. Note: sauce will thicken further as it cools.
3. Puree in blender. Pour through fine metal sieve. Serve warm or chilled.


Fried calamari is as simple as simple can be. I didn't really do any deep frying in class because it doesn't take much skill or talent to do it -- monkeys run the deep fryers at fast food restaurants. But if we were going to do it, I'm glad it was squid -- I got a student to take whole squid and take them apart. And unlike somethings, calamari only needs a minute in the fryer. Our first few batches came out perfect, but the last was a flop -- the temp of the oil dropped, and instead of coming out light and crisp, the last calamari came out heavy, greasy, overcooked and nasty. Mistakes are a learning opportunity.


FRIED CALAMARI

Yield: 16 small appetizer portions
Peanut oil 1 gallon
Squid, tubes & tentacles 2 lbs
AP flour 1 cup
Plain cornmeal 1 cup
Salt to taste
Ground black pepper to taste
1. Place oil in appropriate vessel. Bring to 375˚, measuring with fry thermometer.
2. Combine flour and cornmeal in a mixing bowl.
3. When ready to fry, in small handfuls, dredge the squid in the flour and cornmeal mixture and shake off the excess. In batches, gently lower the squid into the hot oil. Cook for 1 minute. The squid will not be browned, but lightly golden in color. Remove the squid and transfer to a cooling rack turned upside down set over a newspaper-lined sheet pan. Season with salt and pepper, as desired. Repeat until all of the squid is cooked. Make sure to check the temperature of the oil before each batch to ensure it is 375 degrees F. Serve immediately.

Dumplings at their core are meatballs wrapped in dough. In this case, a Chinese-style pork dumpling involves pureeing the pork to make a mouse, spiked with a variety of Asian flavors like ginger, scallion, garlic, sesame, soy sauce and rice wine. We didn't have time to make the dough, but the premade goza wrappers were pretty good.

The dipping sauce was made on the fly, mixing ingredients from the recipe (soy sauce, sesame oil) and spiking it with a bit of vinegar.


PORK SHAO MAI

Yield: 60 dumplings
Pork, ground 2 lbs
Gingerroot, minced 3 tbsp
Scallions, mostly green, minced 4 each
Rice wine 1 tbsp + 1 tsp
Soy sauce 1 tbsp + 1 tsp
Sesame oil 1 tbsp + 1 tsp
Egg white 4 each
Cornstarch 3 tbsp
Fresh water chestnuts, fine dice 2 oz
Thin round dumpling skins 60 each
1. Hand mix pork, ginger, scallion, rice wine, soy sauce, sesame oil, egg white and cornstarch. In batches, place mix in a food processor. Pulse to mix further, then puree.
2. Once the entire batch in pureed, fold in the water chestnuts. Chill until ready to use.
3. Place approximately 2 tsp of the filling in the center of a wrapper. Bring sides up and push/pleat sides together so that the dumpling has an “Empire waist” and some of the filling pushes out the top. Place the shao mai on a cookie sheet and cover with a damp cotton towel until you are ready to steam them.
4. Place enough water into a wok or pan so that it comes up to inch below the steamer basket. BTB. Open the steamer and arrange the dumplings in the steamer basket with space between them. Steam until meat is cooked through, about 5 to 8 minutes. Serve immediately with dipping sauce.

Risotto is a very interactive method. Once you have sauteed the aromatics and the rice andcooked off the wine, it's all about stirring while adding small portions of the liquid, to bring out the starch in the rice to make that thick sauce between the grains. Finished with lots of fatty things, it doesn't take a lot of add ons (in this case asparagus) to make a loud flavor.


CHICKEN ASPARAGUS RISOTTO

Yield: 14 servings
XV OO ½ cup
Onion, medium, dice 2 each
Garlic, minced 1 tbsp
Asparagus, peeled, diced 2 bunch
Asparagus spear tips 2 bunch
Rice, Arborio 3 cups
White wine 1 cup
Chicken stock, hot 16 cups
Butter, cold 8 tbsp
Parmegano-Regiano, grated 1 cup
Mascarpone 17.5 oz
Parsley, minced 3 tbsp
Chicken breasts, large dice 6 each
1. Sautee cubed chicken until medium rare. Set aside. Deep fry asparagus spear tips for 1 minute in 375˚ oil, set aside.
2. Heat oil in a large rondeau, add onion and asparagus, sweat until translucent. Add rice and cook until toasted and opaque, 3-4 minutes.
3. Add wine and cook until alcohol smell dissipates.
4. Add 1-2 ladles of stock at a time until absorbed, constantly stirring. Keep adding ladle by ladle, absorbing fully each time, until all is gone.
5. Remove from heat. Add butter, cheeses and parsley. Stir 30 seconds. Season. Add cooked chicken. Garnish with more grated cheese, parsley and fried asparagus spears.

And that was that. My wife and child came to the school, a few extra staff joined us, and rather than do family-style, I did some plating with the students, using garnishes to decorate appropriate sized portions.

After eating and clean up, I thanked the students, and told them that they were better than the other 7 students who dropped out over the semeseter -- in their professional lives, just being consistent and showing up will be a large part of what proves them to be successful, more than the flakes and the fakers.

There was some talk of starting a new semester in March, perhaps twice a week -- we could get through a lot more recipes and methods, and drill much deeper into theory and directed experimentation. So until then, have a happy new year!